LESSON IN DRAWING
Last week I taught the drawing portion of my 5-week class. Many students are just beginning to draw.
Here are visuals to to help you learn the process…
BASICS:
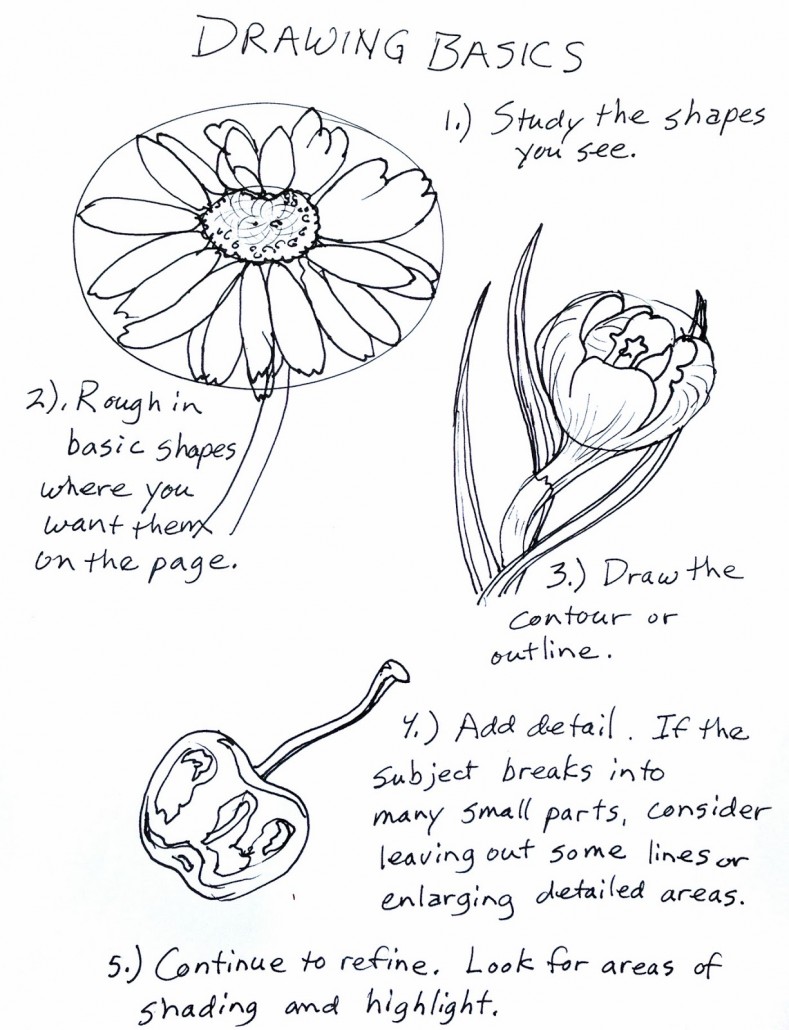
The first decision is where to place the drawing on your page. Lightly draw a very basic shape, or outline, on your page and you won’t just be leaving the placement up to chance. For the daisy below, I drew two ovals, one defining the outside shape and one defining the flower center. Notice that outside oval is merely a guide, and many of the petals fall short of the perimeter while some might reach outside. The center oval is actually placed above true center, which allows the petals closest to the viewer to be longer.
FIND THE SKELETON:
Plants tend to be organized in patterns, and when you can make sense of the pattern you can draw them. Generally, a good place to start is with the structure — that which connects or holds up the subject. Look for specifics — for where leaves connect to stems, numbers of petals, jagged or smooth edges, petals arranged in a circle, curves or cupped forms.
Look for what is “the rule” and also for exceptions to it.
SET YOUR DIRECTION:
First I drew the axis line. That line determines the curve of the tropical plant in the top drawing or the echinacea in the lower drawings. For the echinacea, the axis line became one side of the stem. Then I drew in the circle for the cone. Curved, spiral lines going both directions across the cone cover the upper part of the axis line. The petals are also drawn over what is already there. Notice with the tropical that while I drew the box first, I did not squeeze the drawing into it but instead allowed it to spill out over the box. It just worked out that way.
CONTROL vs. CREATIVITY:
Drawing quickly often allows for more expressiveness. These quickly made drawings are not intended to be “perfect”. I can always refine later — to make them either more expressive or more precise. Focusing on making a drawing too perfect can squeeze the life right out of it 🙂 Drawing is a dance between seeing the “big picture” and noticing the details. There’s no one right way to do it! If you’re working toward being more accurate, yes, that will take some thought. So pause long enough to know where you’re headed, then let go and trust your arm to get you there.
DIVIDE AND CONQUER:
For advanced drawing… more complex shapes simply take a bit longer to understand. Sometimes it’s just a matter of learning the curves and shapes at a particular angle of view. A 5-petaled flower still follows a logical pattern even when viewed from the side. Make sense of a complex shape by dividing it into sections. Some fern fronds will repeat the same patterns on a different scale as you follow up the stem!


THANK YOU!
I am leading my students into sketching for math word problems and your tutorial is a wonderful start. I hope you continue your series and include insects and small animals. Geometric shapes in 3D with perspective maybe. Sketching similar 3D polygons is a challenge because scaling them is the crux of the problem and we start too BIG!
Thank you so much! A non-artists really loves your lessons so I can be a better teacher!!
Leslie