MAKE A BRUSH CASE
When I began traveling regularly between my studio and other teaching locations I needed a case to organize my brushes. A search at the local art store was unproductive. I wanted one with a small footprint for traveling that would hold quite a few brushes. While I found several great pencil cases, they were not sized large enough for my brushes. But then I realized that the largest case turned sideways would be the right size. It works perfectly to store brushes by simply adding elastic bands to secure them.
YOU WILL NEED

-
A leather covered 120 pencil case, by Global Art AMAZON LINK
-
Four 8 inch long pieces of black, 1 inch wide elastic
(two are enough for a single brush compartment)
-
A sewing machine
-
Scissors
-
Thread

As long as they aren’t longer than the case, there’s no problem closing the case with your brushes inside.
FOLLOW THESE STEPS
Here’s how — it’s easy!
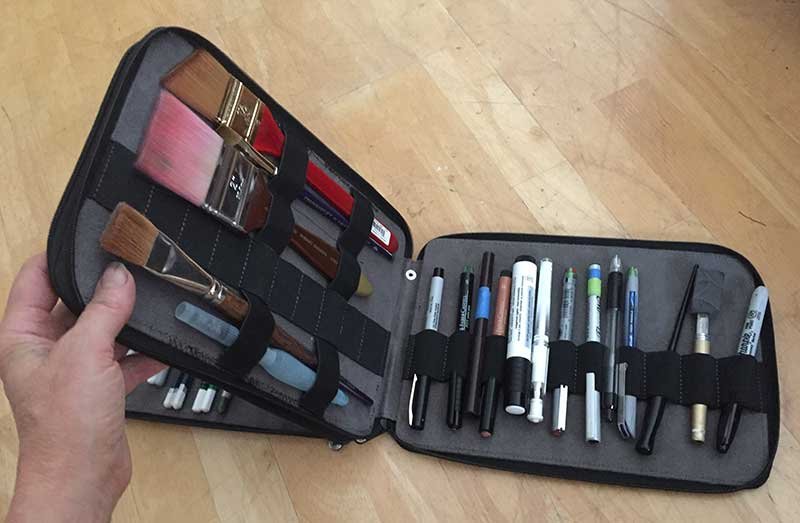
The Global Art case has two zippers and inside are elastic bands that hold pens and pencils. My modified case uses bands of elastic sewn perpendicular to theirs to hold brushes.
STEP 1. Open both zippers and lay the outside covers flat. You’ll leave the outsides exactly as they are — that way you won’t be sewing on the leather, adding elastic to both sides of the Inner section for holding brushes. You’ll have two compartments that hold pens and pencils on the outside covers plus compartments that hold brushes on both sides of the inner section. Or if you prefer, just make one for brushes with three holding pencils.

To hold my larger brushes with longer bristles, I’m adding the elastic at the 5th and 8th pencil slots on one compartment (counting from the zipper end). Then I’ll stagger the elastic on the opposite compartment, attaching it at the 4th and 7th pencil slots. That way I don’t have to sew through double thicknesses of elastic and it works better for my brush sizes anyway.
Step 2: Fold the end of the elastic in half lengthwise and shove it under the pencil slot. Pull through until even on both sides. It should overhang the width of the case by about 1/4 inch on each side.

Step 3: Fold about 1/4 inch of the end of the elastic under, and sew with a straight stitch to tack it in place, sewing right over the existing stitching along the edge. The backing material is quite thick, so you may need to turn the machine by hand to get the needle to punch through. Do this for both pieces of elastic on one side.

Step 4: Flatten the elastic (hold it snug but not too tight) and trim with the scissors if needed so you can fold the other edge under and tack in place with a straight stitch. Turn the inner section over and repeat steps 3 and 4 with the two pieces of elastic on that side. Once all four elastic straps are tacked on both sides, go over them all again either with a zigzag stitch or a second straight stitch to secure them.

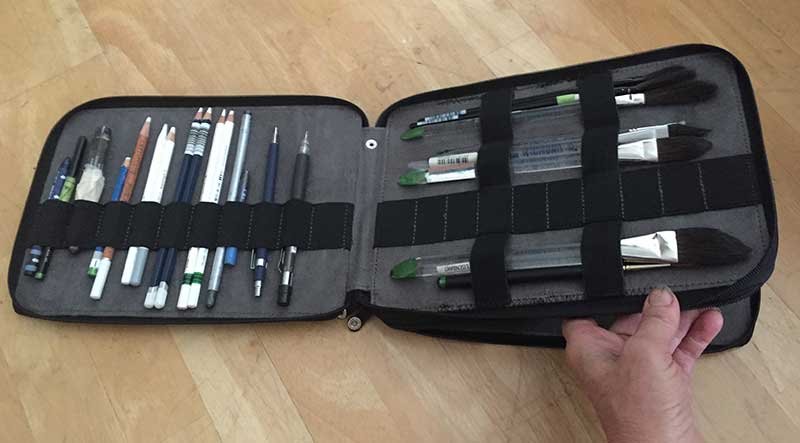
Step 5: You’ll have a long side to the elastic and a short side. Make a divider to separate the long side into two slots by stitching over the elastic, the same way the original elastic is separated into slots with stitching to hold pencils. You can easily put several smaller brushes into each slot, so no need to further divide.
Step 6: Trim your loose threads and load it up! From now on you’ll easily be able to keep both brushes and pencils organized. I also keep an x-acto knife in the case, using a piece of foam or a kneaded eraser to cover the blade.
One last suggestion — keep your case out of of the rain if you’re painting in a moist environment or the leather will stretch.

