WATERCOLOR on CRADLED PANEL
A Cradled Birch Panel by American Easel is contemporary and gallery appropriate for a watercolor painting when finished with acrylic
Clicking on any red text below will take you to related blog posts:
Attach blank watercolor paper or finished painting — either will work.
Be sure to check the tips & tricks and the materials list on my Blog…
Step 1
PROTECT THE ART
Seal your finished watercolor thoroughly with up to seven coats of Golden Archival Varnish with UVLS (gloss). Let this dry completely.
Step 2
PROTECT YOUR CRADLE
If you’re planning a clear finish, cover the wood edges with 2-inch blue painters tape. This can be left on safely for several weeks.
Step 3
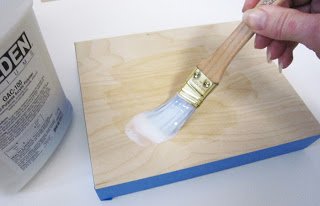
SEAL THE WOOD SURFACE
Apply two thin coats of Golden GAC 100. This is necessary to prevent acids in wood from yellowing the paper over time. Dry several hours.
Step 4
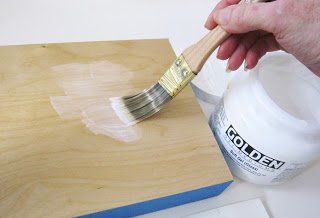
ADHERE ARTWORK
Cut your paper a bit larger than the Panel to overlap on all sides. Coat both the back side of the paper and the wood surface with Golden Soft Gel (gloss). Allowing time for the paper to stretch and relax. Use enough gel to form a good bond, but void using excess that would pool in a bump or squeeze out. Position the art (or blank paper) accurately. This is easy if the painted area is larger than the panel. Press paper to cradle. Cover with a sheet of plastic to protect art, then press outward to remove air bubbles. Wipe off any excess gel around edges. Check position. Top with several heavy books. Check to be sure the surface is flat before it dries completely.
Step 5
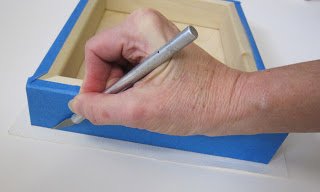
TRIM PAPER EDGES
Place the art face down over a cutting surface. Use an X-acto knife to trim paper along edges of Cradled Panel. This is easiest with thinner weight paper — take care to cut heavier paper straight. Sand with extra fine sandpaper and a small wood block to even surface irregularities.
Step 6
APPLY TOP COAT
Use Golden Top Coat with UVLS (semi-gloss) to protect your art completely. You might thin the medium with a little water to make an even, flat coat that will not become gummy while applying (especailly helpful on larger panels). Brush side to side. If you’ve applied adequate varnish (step 1), the paint will not lift or rum. If your paint does run, you can try wiping away the top coat, then reapply after it’s dry. Wipe any extra material from the edges. Let dry. Applying a second coat, brushing up and down, will create canvas-like texture.
Step 7
FINISHING TOUCHES
Remove the blue tape. Sand lightly. Stain or paint Panel edges with acrylic paint, or keep the natural look and finish the wood with a polyurethane varnish, taking care to mask off the art surface with tape. Add a couple of “D” rings and framing wire, and VOILA! It’s ready to hang.
© René Eisenbart / www.rene-art.com


Thanks for explaining the process. I will definitely follow your step by step instructions.
Very confusing. I have to apply 7 coats of varnish first then in the last step I need to apply another top coat to protect my painting and the paint can still run? What?
The multiple coats are of the spray varnish, and as the instructions say, this seals the watercolor. If your substrate is acrylic coated before you paint (such as a 50/50 mix of matte medium and water) or on Yupo instead of untreated watercolor paper, it seals much faster — one or two coats. Think of this as your isolation coat. Top Coat is an acrylic gel that adds protection from UV and from the elements. I still seal the back of the watercolor paper with regular acrylic gel if not attaching to a panel.