I’ve been playing with Marbling… 
 Besides being so much fun, it’s one way to turn a painting that doesn’t quite gel into something amazing. Of course, I never really know what I’ll end up with, but sometimes I get lucky!

Here’s an example…
 This large painting of a child eating an ice cream cone doesn’t work
because the hands and arms are too small and don’t look natural.
Yeah, I realized this AFTER I’d spent lots of time working on it! But I
LOVE the color and texture of the thing.

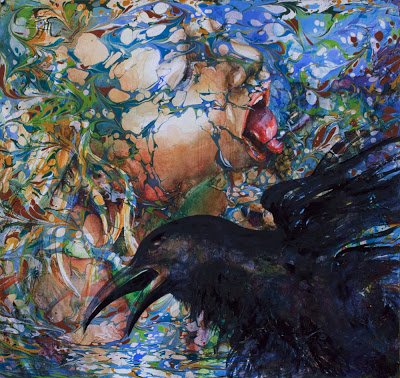
So Voila… a dip in the marbling bath plus an over painting, and look…

“Raven Dreams”
The hands were adequately obscured, but I felt the marbling pattern was a bit too busy — no central image or place for the eye to rest. So I added the bird, painting transparent enough that the marbling still shows through a bit.  I’m thrilled to say that this painting will hang in the Spring WSO show in Albany!
…….

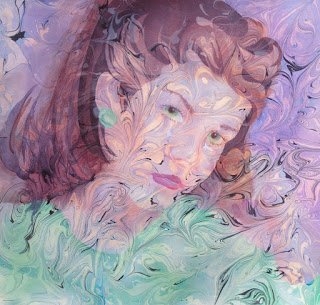
Below, another painting that is quite intriguing after the marbling… It’s an airbrush piece that I originally painted for the Oregonian. It was a little sappy and WAY too pink! Covering it with a semi-transparent blue/black marbling pattern turns pink to violet and gives it the look of a tattoo. I also added more hair on both sides and cropped the empty space on the right. But I could still play with an overpainting…


“Pandora’s Mask”

You can’t enter art shows without opening the door for rejection. And I’ve had my share.
The way I see it, entering alone is a win. If you make a habit of entering, you’ll set yourself up for success.

In
2010, both my Rose Show entries for Oregon Society of Artists earned an award, which was a wonderful
surprise! Below is the painting “Tucked In”, 24×24, that took second place in the rose division. My pastel took honorable mention in the Portland category.

But neither of my entries for the 2011 OSA Rose Show were even accepted into the show. I thought they were both strong pieces, and even heard speculation that “Joy in the Park Blocks” below, 11×14, would be a top award contender.

“White Rose” was my other entry.

……..
While no stranger to rejection, I hadn’t even considered not making the cut on this one. I picked up my battered ego and spoke with the juror, to gain a window into his decision making. Bottom line, not everyone thinks like I do! And in the end, what resonated with me was the great pleasure I took from the success of students whose art DID make the show. Their work was definitely deserving.

The sting passed quickly.
As is often the case when something painful happens, it left me with humility and empathy. So much so, that when the same thing happened again in 2012, I hardly blinked an eye!

“Rock & Rose” above, 18×18, entered in the Portland category
“Why?” below, 30×30, entered in the rose category

…and neither of them were chosen for the show. Yes, these are both somewhat experimental— nontraditional in subject, technique and style.

It goes to show, you just can’t take it personally when a piece doesn’t make the cut.
With one sole person doing the choosing, any artist might be rejected, based on the preferences of that juror. Some shows have large numbers of qualified entries and some have to be culled.

Why aren’t there several jurors choosing? Having one juror can actually increase the odds of a great show. With a committee, the best art could be excluded along with the worst, leaving the mediocre.

What to do about rejection? The
solution is simply to keep entering. Take heart. If you don’t enter, you can’t win!

Sooner or later, you’ll score.
……
NOTE:
After writing this story I
reentered the
“Rock & Rose” painting shown above with the title “Party Girl” and it took 2nd
place in the 2013 Rose Show’s Portland category! See all the award winners here  

And now I’m waiting to hear about NWS signature membership, hoping!
…………………………..


As Vincent van Gogh said, “it is difficult to know oneself, but it isn’t easy to paint oneself either”
      Ah, but the self image is fun to play around with! HE played frequently…

Painting ourselves — That’s what we’ll be doing on Friday at Oregon Society of Artists in Goose Hollow.
        As part of the process we will experiment with different paint techniques and surfaces or alternate color schemes.

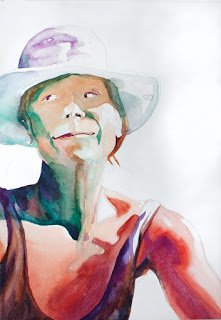
The above portrait of me, in progress, uses cool accent color to contrast with the warmness.
        I chose it for the interesting shadow pattern.

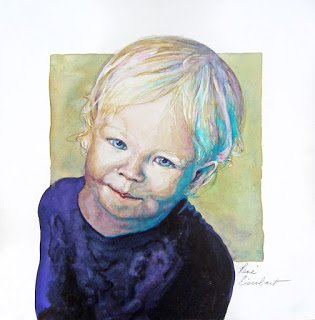
The aqua shadow on the face of this portrait of my friend’s grandson draws attention to his expression.

Click for MORE INFORMATION
Download REGISTRATION for the workshop.

I like painting myself! Does that mean I’m self absorbed? Maybe…
But there are very good reasons to use your own image for a painting.

For one thing, you always are available and won’t have to pay (or bribe) someone else to model.
You needn’t worry about pleasing anyone else, so it’s easier to take risks or be experimental with a self portrait.
It’s also a good way to push technique.

You can play with creative color or interesting value patterns! I call the painting above “Alter Ego”.  There’s texture added to the watercolor paper before painting, using tissue paper, gesso and mat medium.  I stamped with ferns into the medium to create texture.

In the painting “Epic Island”, below, I intentionally did not focus on getting all the features proportional. The nose is too big, eyes set a bit low. But it captures the feeling I wanted, with some exaggeration and weird color. Not everyone will appreciate blue and purple shadows, and that’s OK…

The best reason for making a self portrait is that the creative process is one of self
discovery and realization.
A portrait can be a window to the soul, as much as a likeness.

I’ll be teaching a SELF PORTRAIT workshop at Oregon Society of Artists on September 27th, 2013.
10am – 4pm
$95   / Register or more information HERE

“Possessing Nothing Yet Having Everything” Chris Stubbs

I remember talking with Chris Stubbs, a well loved portraiture artist who was teaching at OSA Tuesday mornings, about our painting challenges. And she said, “each time we paint, we have to prove our ability to do it over again, don’t we?”

You would think after painting all the years I have, that I would be able to know a piece will “work out”. It’s true, having a history of success does bolster confidence. But each time, starting with that white piece of paper, I reaffirm my ability. Or not… some paintings just don’t work out the way I want them to.

As an artist, I quickly lose interest in playing it safe. I WANT to take risks — challenging myself to work on the edge of my ability. That’s where the FUN is!
It also leaves room for failures and mishaps.

“BIGdarrin” Ted Nuttall

And that reminds me of what Ted Nuttall said at the WSO Fall Convention (2011). ” We never achieve the level of success in our paintings that we see in our minds. The mind is always one step ahead”.

So true…!

Here’s my holiday greeting to you for 2012…

      This is a new version of a painting I’ve been working on, blossoms from the magnolia tree off my deck. I started painting this at the Wild Arts Festival. It follows the colorful white flower theme, based on my belief that if you get the values right, you can paint in any color you like! Perhaps this proves the point.

Marbling is not so predictable.

Full disclosure: it’s time consuming, messy and results vary. Preparing the paint is a challenge. But once you’ve mastered paint mixing, basic concepts are easy to learn. Some degree of control is gained through experience. Possibilities are endless… and how exciting to see the transformation!

I originally learned to marble from Galen Berry, who is a master. If you have the opportunity to take a workshop with him, do it! I won’t go into detail on the process, because you can find it all on his site. Galen also sells the supplies and a very good instruction booklet.

The surface to be marbled is first treated with an alum water solution and dried. The paint sticks where the alum was.

 The process uses acrylic paint — we used M.Graham, which worked very well — whereas some quality paints don’t work at all. The Terre Rosa was fabulous! The paint is thinned with water to the consistency of milk or light cream and spritzed over a tray of carrageenan water, adding more and more color until the surface is covered. Then you can create patterns by cutting and combing the surface in zigzags or swirls. Or add gall which pushes the paint away, creating lacy “holes” in the pattern.

Originally my interest was in cloth. I found it ideal to cover journals — a way to personalize them. We purchased cotton cloth from the Dharma Trading Company.

My next discovery was marbling over silk ties (with original patterns and colors less than fabulous). Adding a marbled swirl pattern smoothed and integrated the stiff geometrical shapes while introducing a few new colors. Definitely one-of-a kind wearable art!

For shirts, both sides need to be marbled separately. A favorite T top had a little stain. Fixed that with marbling! You’ll never spot it now. Silk works best.  Tip: paint does not stick well once the cloth is wet. I made a form out of a rigid sheet of plastic to keep the
second side from becoming wet while I marbled the first side.

What I am most thrilled with is how marbling transforms a painting that isn’t working.

This was a throwback to my airbrush days, but the painting had no serious possibilities as art until marbling over it.

My brain is churning over other ideas combining marbling with watercolor. Thin rice paper marbles well and is almost transparent for using in collage work.

My WEB PAGE has been updated …
CLASSES for 3013,  www.rene-art.com

Online registration for my workshops is still to come. Just contact me to sign up…

9 of my paintings (below) are available for sale at Paxton Gate, 
just in time for Halloween. 
They are smallish and with classic black frames.

Paxton Gate is a very cool place, 
if you have not yet been introduced. 
It contains all things weird and beautiful, from nature — 
bones to butterflies. 
The Portland store is located on N. Mississippi, 
next to Pasta Works. Clicking on the red name 
takes you to their web site.


Last Sunday I was at the OSA booth at “Art in The Pearl”, 
doing a demo on white flowers. 
There was a time when I avoided painting white flowers, especially with white backgrounds… 
it was difficult to give them interest and definition. 
But that was because I thought shadows should be gray.
Then I discovered a wonderful thing 
about white flowers… 
                     they can be any color you want to make them! As long as the values are true, 
the color is believable. In other words, white flowers are better
with colorful shadows and reflected color. 

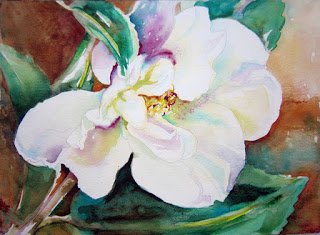
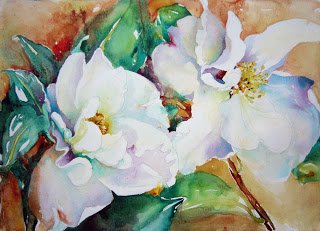
Take these Sasanqua Camellias.
The color in the petals make them appear almost translucent!
Without the color, above, the shadows are just gray.
See how flat this looks compared to the first one?
 
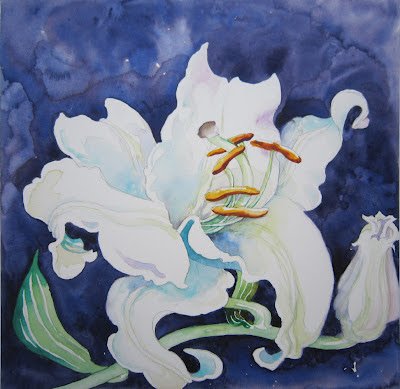
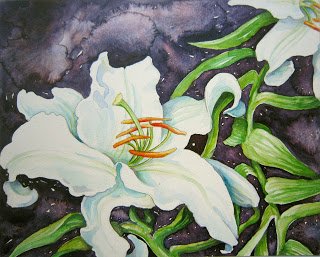
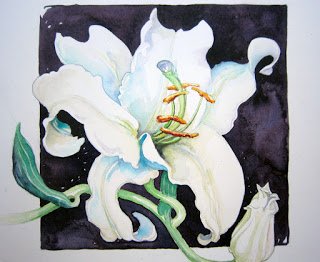
Same thing with these lilies. White doesn’t have to be boring or drab. 
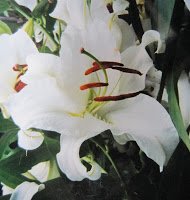
For the lily above, I used one of the lilies in the photo below. Can you find the one? 
It’s the flower in the center, cropped out (and rotated) below, right.

 I like it’s curves — the twisting shape 

the contour makes — and have used the same basic form 
in several paintings.